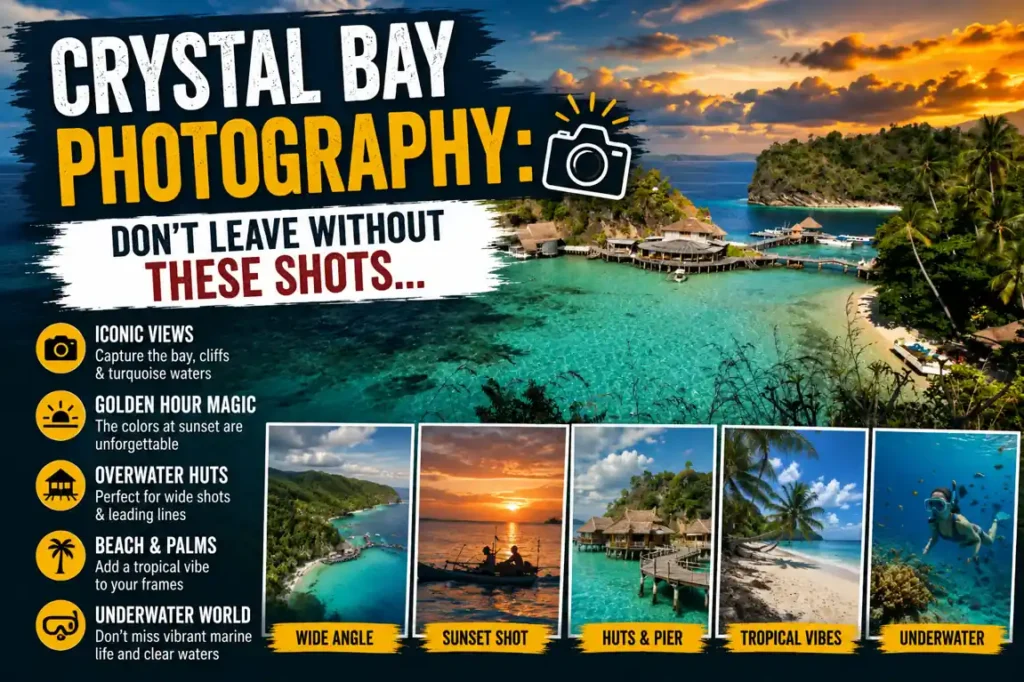

Crystal Bay Photography isn’t just about pointing a camera at water and hoping for the best. Anyone who’s been to Nusa Penida knows the place practically dares you to take a bad photo, and yet somehow, plenty of visitors walk away disappointed with blurry, washed-out shots that look nothing like what they saw in person. This guide is here to change that.
I’ve visited Crystal Bay four times across different seasons, carried everything from a mirrorless Sony A7IV to nothing but an iPhone 14 Pro, and spent a lot of time just sitting there figuring out why certain shots worked and others didn’t. Crystal Bay Photography has a handful of quirks you really need to know before you arrive, and once you do, this place becomes genuinely one of the most rewarding beaches in all of Southeast Asia to shoot.
What Makes Crystal Bay So Photogenic
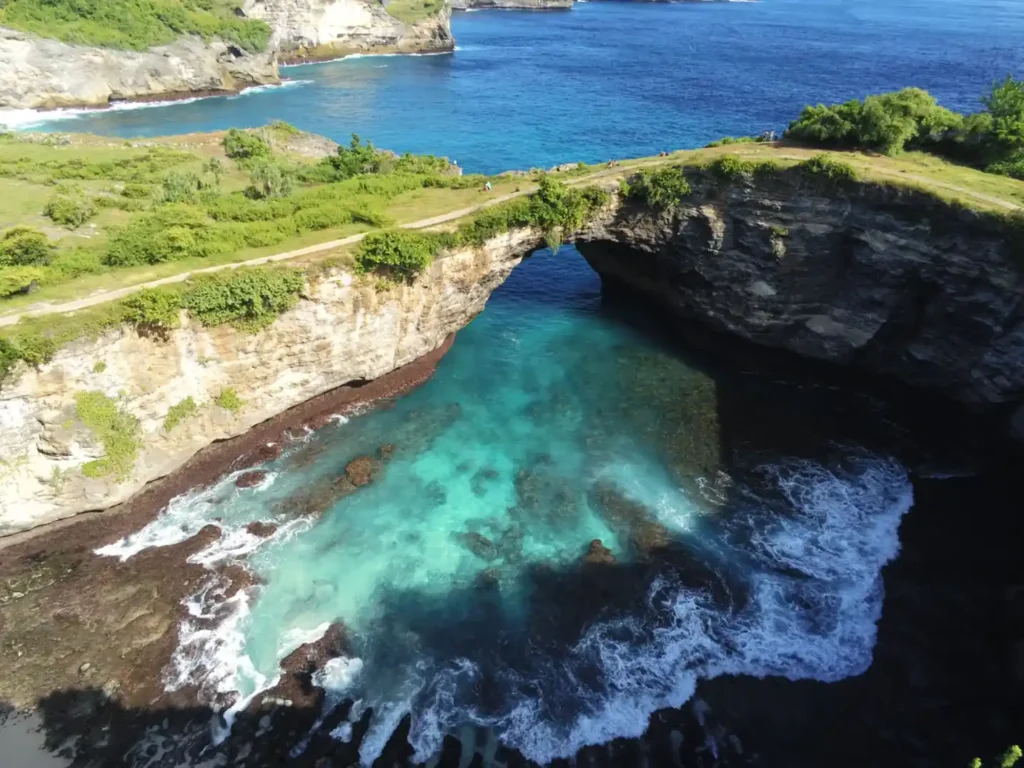
Crystal Bay sits on the western coast of Nusa Penida, Bali, and it earns its name honestly. The water genuinely is that shade of clear turquoise, not a filter, not clever editing. The reef drops off sharply just a hundred meters from shore, so you get this dramatic contrast between shallow bright water and deep dark blue in a single frame.
The surrounding cliffs are covered with tropical vegetation, and there’s a small temple perched on the rocky headland that adds a cultural layer most generic beach photos don’t have. That combination, colourful water, dramatic cliffs, jungle greenery, and traditional architecture, is why this spot gets so much attention from travel photographers worldwide.
According to Lonely Planet’s Bali & Lombok travel guide (2023 edition), Crystal Bay is listed among the top five most visually striking beaches in the Indonesian archipelago, not just for swimming, but specifically for photography and scenic value.
Best Time to Visit Crystal Bay for Photography
Timing is honestly where most people go wrong. You show up at 11 am, squint into harsh overhead light, take a few shots, and wonder why everything looks flat.
Here’s a breakdown of the best times to visit throughout the day. Use this to plan your arrival:
| Time of Day | Light Quality | Crowd Level | Best For |
| 5:30 – 7:00 AM | Soft golden light | Almost empty | Landscape & reflections |
| 7:00 – 9:00 AM | Warm directional light | Very low | Portraits & wide shots |
| 9:00 – 11:00 AM | Bright but manageable | Building | Water clarity shots |
| 11:00 AM – 3:00 PM | Harsh overhead sun | Crowded | Avoid if possible |
| 3:00 – 5:30 PM | Warm afternoon light | Moderate | Candid & beach life |
| 5:30 – 6:30 PM | Golden hour glow | Low to moderate | Sunset & silhouettes |
Sunrise vs Sunset: Which Light Works Better?
Short answer: Sunrise wins, and it’s not even close. Crystal Bay faces roughly west, which means you won’t get the sun rising directly over the water, but you’ll get this incredible soft side light hitting the cliffs and reef while the sky transitions from pink to blue. It’s genuinely beautiful in a quieter way.
Sunset at Crystal Bay gets dramatic. The sky turns orange, and the silhouettes of the palm trees against it can be spectacular. But by late afternoon, the beach fills up with day-trippers, and you’re fighting for clean angles. I’ve had some stunning sunset shots here, but I’ve also had sessions where five speedboats were in every frame.
Best Season for Crystal Bay Photography
- Dry season (April to October) offers the clearest skies and calmest water
- July and August have the most reliable blue-sky days
- May and September are ideal, great light with fewer tourists than peak months
- Wet season (November to March) brings dramatic clouds that can look incredible, but limit clear water shots
- Water visibility for underwater or snorkel photography peaks between May and September
Sunrise or sunset? Discover which lighting creates the most stunning Crystal Bay photos: read more in Crystal Bay Sunset Guide: Why Photographers Keep Coming Back to This Beach.
The Most Beautiful Photo Spots Around Crystal Bay
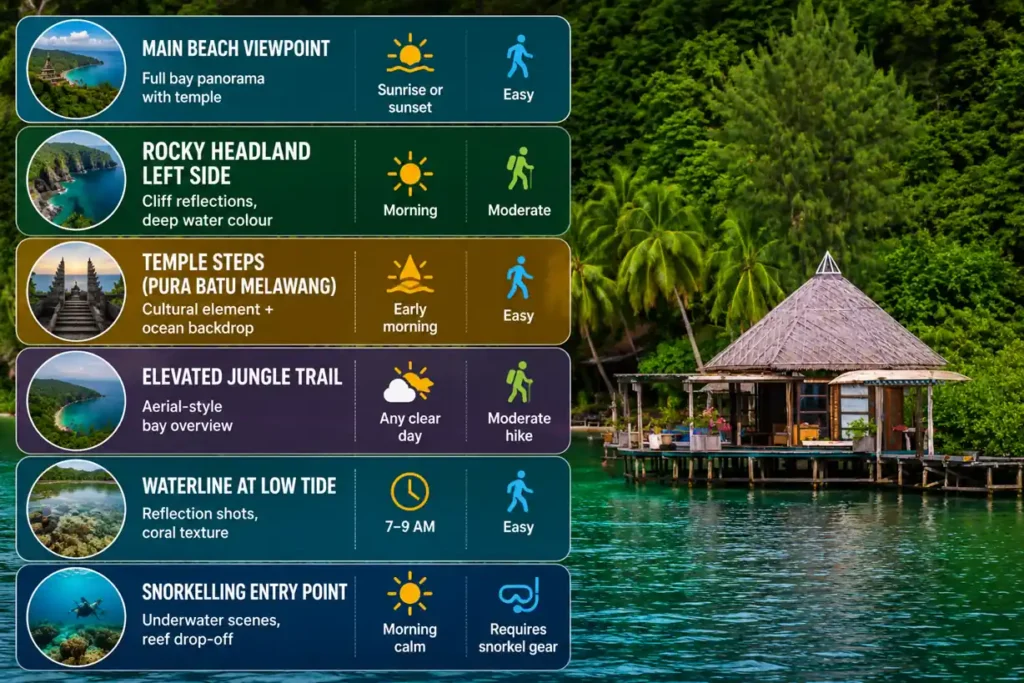
These are the specific locations around the bay, each of which offers a genuinely different composition:
| Location | What You Capture | Best Time | Difficulty |
| Main beach viewpoint | Full bay panorama with temple | Sunrise or sunset | Easy |
| Rocky headland left side | Cliff reflections, deep water colour | Morning | Moderate |
| Temple steps (Pura Batu Melawang) | Cultural element + ocean backdrop | Early morning | Easy |
| Elevated jungle trail | Aerial-style bay overview | Any clear day | Moderate hike |
| Waterline at low tide | Reflection shots, coral texture | 7–9 AM | Easy |
| Snorkelling entry point | Underwater scenes, reef drop-off | Morning calm | Requires snorkel gear |
How to Capture Crystal-Clear Water in Photos
The water here really is crystal clear; you can see straight down to the coral from 10 meters away on a good day. But capturing that clarity in a photo takes a bit more than just pressing the shutter.
The biggest thing is polarising filters. A circular polariser cuts through the surface glare that makes water look milky or reflective rather than transparent. You rotate it until the reflections disappear, and suddenly, the reef just appears through the water. On a smartphone, there are clip-on options that actually work pretty well.
How to Photograph Clear Blue Water at Crystal Bay
- Use a circular polarising filter to eliminate surface glare
- Shoot during mid-morning (8–10 AM) when the sun angle cuts through the water
- Shoot from slightly elevated positions, even a metre of height dramatically improves water clarity in photos
- Avoid shooting into direct sunlight reflecting off the surface
- For underwater shots, use a red filter to compensate for the blue colour cast below 3 metres
Beach Photography Ideas That Don’t Feel Repetitive
Look, there are only so many ways to photograph a beach before it starts to feel like the same shot with a different backdrop. Here’s what actually keeps Crystal Bay photos interesting:
- Shoot the local fishing boats moored at the northern end, they’re colourful, textured, and give the scene a real sense of place
- Photograph the market vendors near the car park in the early morning, a genuinely underrated local detail
- Look for negative space, Crystal Bay’s clean horizon, and minimal beach furniture make minimalist compositions work really well
- Use the temple as a foreground element with the ocean behind it; it’s an immediate visual anchor
- Time-lapse the boat traffic using a GoPro mounted on the rocks, even 30 minutes of footage produces something interesting
Camera Settings for Bright Coastal Conditions
Bright beach environments are challenging; your camera’s metering system gets confused by the mix of bright water and shadowed areas. Here are the settings that actually work:
These settings work across most modern mirrorless and DSLR cameras in bright coastal conditions:
| Scenario | Aperture | Shutter Speed | ISO | Extra Tip |
| Wide landscape shot | f/8 – f/11 | 1/250s | 100–200 | Use a graduated ND filter |
| Motion-freeze waves | f/5.6 – f/8 | 1/1000s+ | Auto | Burst mode helps |
| Silky water effect | f/11 – f/16 | 1/2s – 2s | 100 | Need ND filter + tripod |
| Portrait on the beach | f/2.8 – f/4 | 1/500s+ | 100 | Position with the sun behind you |
| Drone aerial | f/5.6 | 1/500s | 100 | Manual mode for consistency |
| Underwater snorkel | Auto with exposure +0.7 | 1/250s+ | 400–800 | Red or pink filter essential |
Shooting the Landscape Without Losing Scale
Crystal Bay is one of those places that looks enormous when you’re there but somehow shrinks in photos. The cliffs are maybe 40 metres tall, the bay is roughly 300 metres wide, and yet standard shots make everything look modest.
The fix includes a human element. A single person standing on the rocks makes the cliff look massive. A kayak on the water suddenly shows you how vast the bay is. It sounds obvious, but it’s surprising how often people wait until the frame is empty before shooting. Sometimes, the person in the frame IS what makes the photo compelling.
Tips for Shooting Wide Landscape Shots at Crystal Bay
- Include a person, boat, or object to establish scale
- Use a wide-angle lens (16–24mm equivalent) to capture the full bay sweep
- Shoot from the elevated headland trail for depth and layering
- Use foreground elements like rocks or vegetation to create visual distance
- Avoid centring the horizon, place it on the lower or upper third
Natural Frames Hidden Around Crystal Bay
Frames within frames are a classic composition technique, and Crystal Bay is genuinely full of them if you look. The dense jungle path down to the beach creates natural tunnel shots. Two large boulders on the south end of the beach frame the headland perfectly. The arching palm trees near the temple create a soft border around the bay view.
I once spent an entire hour just working a gap between two rock formations at the waterline. The resulting shot had this moody, intimate quality that none of my wider panoramic shots came close to matching. Sometimes, constraining yourself to a small frame forces you to find something more interesting than the obvious postcard angle.
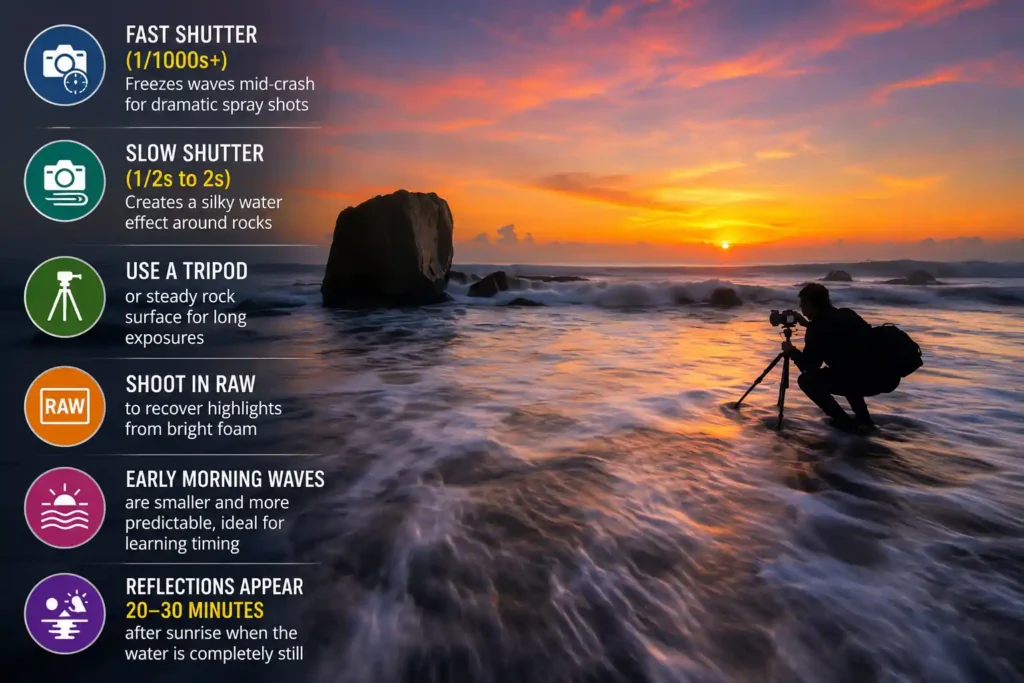
Photographing Waves, Reflections & Motion
- Fast shutter (1/1000s+) freezes waves mid-crash for dramatic spray shots
- Slow shutter (1/2s to 2s) creates a silky water effect around rocks
- Use a tripod or steady rock surface for long exposures
- Shoot in RAW to recover highlights from bright foam
- Early morning waves are smaller and more predictable, good for learning the timing
- Reflections appear in the 20–30 minutes after sunrise when the water is completely still
Waves at Crystal Bay tend to be gentle inside the bay itself; it’s a sheltered cove, but the rocky shoreline creates interesting splash patterns when the swell picks up. The real spectacle for slow shutter work is actually the water rushing in and out between rocks rather than the waves themselves.
Getting Clean Minimal Beach Shots
Clean minimal photography at Crystal Bay is genuinely achievable; the beach isn’t as littered or as chaotic as some of the more touristed Bali spots. But you still need to be strategic about timing and angle.
The north end of the beach near the boat moorings tends to have more activity. The southern end, past the main warung strip, is quieter, and the water is calmer. Shooting from a low angle on the waterline tends to eliminate background clutter naturally; you just get sand, water, and sky.
Getting Clean Beach Photos Without a Crowd
- Arrive before 7 AM, the beach is nearly empty before tour boats start arriving
- Shoot from a low waterline angle to cut out background people naturally
- The southern end of the beach is consistently less crowded
- Weekday visits (Tuesday to Thursday) have noticeably fewer visitors than weekends
- A shallow depth of field blurs out background distractions when they can’t be avoided
Candid Travel Photography at Crystal Bay
The local warungs (small restaurants) near the beach are full of authentic moments, vendors preparing fresh coconuts, fishermen sorting their catch, and kids watching tourists with genuine curiosity. According to National Geographic’s travel photography guidelines, the best candid travel shots come from spending time in a place without the camera raised, people relax, forget you’re there, and then the real moments happen.
I usually spend 20 minutes just eating and watching before I take any candid shots. It sounds inefficient, but the photos from that approach are consistently more interesting than anything I get by walking in camera-first.
Drone Photography: What Looks Best From Above
Crystal Bay from above is stunning. The contrast between the clear turquoise shallows and the dark deep section is something you simply can’t capture at ground level. According to Indonesia’s Civil Aviation Authority (DGCA) regulations updated in 2022, drone flight in tourist areas of Nusa Penida is permitted below 120 metres but requires registration for commercial use. Check local rules before flying.
- The reef drop-off pattern shows dramatically from 60–80 metres altitude
- Early morning gives the best colour saturation from above
- The small temple on the headland looks incredible at a 45-degree downward angle
- The curved shape of the bay is most apparent around 100 metres
- Watch for strong offshore winds in the afternoon; gusty conditions affect stability significantly
Creative Portrait Ideas at Crystal Bay
Portraits here basically take care of themselves if you get the positioning right. The blue water as a background is flattering in a way that’s hard to replicate. A few specific setups worth trying:
- Waist-deep in water, facing the cliffs with the water behind, the colour contrast is extraordinary
- Seated on the large flat rocks on the southern headland, the ocean drops away dramatically behind
- Walking away from the camera along the shoreline, the empty beach shot that somehow never gets old
- Silhouette against the sunset sky from the elevated trail gives a cinematic quality with minimal effort
Smartphone Photography Tips for Crystal Bay
- Use Portrait mode for beach portraits; it handles the bright background well
- Enable RAW shooting if your phone supports it (iPhone ProRAW, Samsung Expert RAW)
- Use the 0.5x ultra-wide lens for sweeping bay panoramas
- Tap and hold to lock exposure when shooting bright water scenes
- Apply a polarising clip-on filter for water clarity, roughly $15–25 USD on Amazon
- Shoot in the Google Camera app (Android) or Halide (iOS) for more manual control
How Weather Changes the Mood of Your Photos
Clear skies produce the classic postcard look, vibrant blue water, green cliffs, and bright white sand. But honestly, some of the most interesting Crystal Bay photography happens on cloudy days. Overcast light eliminates harsh shadows and makes the water’s colour more saturated and even.
Dramatic cloud formations over the bay can turn an average shot into something genuinely striking. I’ve seen photographers specifically time trips for the transition between dry and wet season (October–November) just to catch these moody sky conditions.
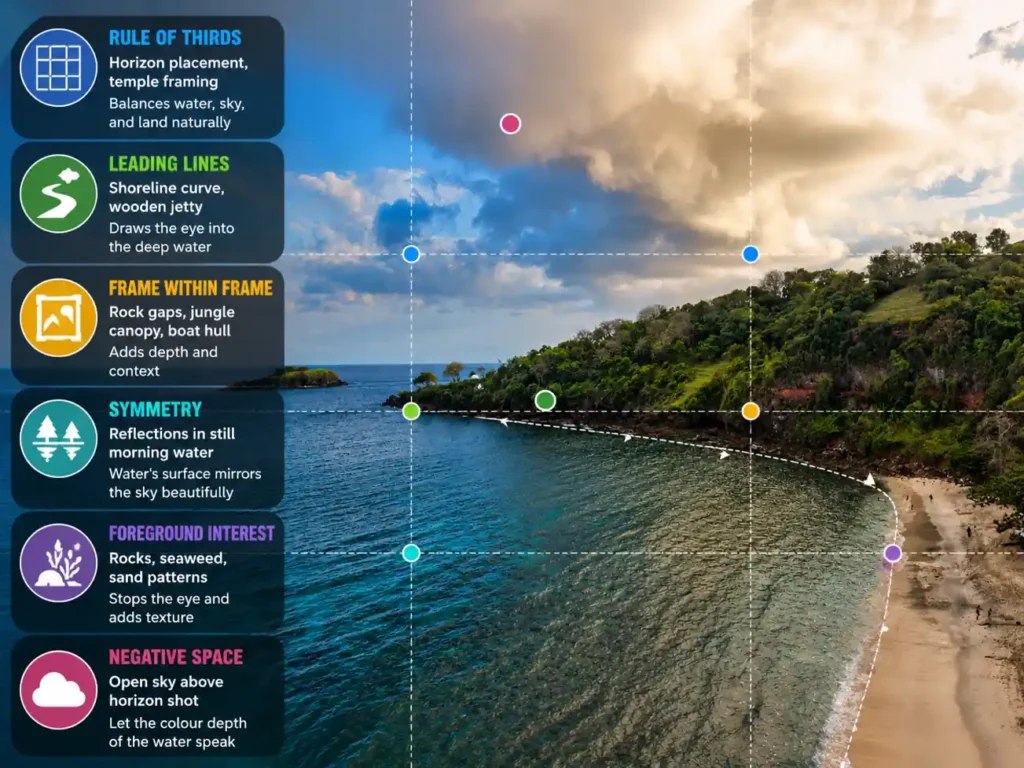
Composition Tricks That Work Especially Well Here
A quick reference to the composition techniques that consistently produce strong Crystal Bay shots:
| Technique | Where to Apply It | Why It Works |
| Rule of thirds | Horizon placement, temple framing | Balances water, sky, and land naturally |
| Leading lines | Shoreline curve, wooden jetty | Draws the eye into the deep water |
| Frame within frame | Rock gaps, jungle canopy, boat hull | Adds depth and context |
| Symmetry | Reflections in still morning water | Water’s surface mirrors the sky beautifully |
| Foreground interest | Rocks, seaweed, sand patterns | Stops the eye and adds texture |
| Negative space | Open sky above horizon shot | Let the colour depth of the water speak |
Editing Crystal Bay Photos Without Overdoing Colors
The water here is already that colour. You don’t need to push the teal slider in Lightroom to 80 and call it a day. The most common editing mistake at tropical beach locations is over-saturation, which produces photos that look fake, which ironically makes them less impressive than a more restrained edit.
The adjustments that actually improve Crystal Bay shots: slight increase in clarity (around +15 to +20), shadow recovery on the cliff areas, and a careful dehaze to deepen the water’s tonal range without making it look artificial. Skin tones in portraits need a warming touch since the cool water light tends to make people look slightly blue.
Editing Tips for Crystal Bay Photos
- Keep saturation increases under +20, the water colour is real, trust it
- Use dehaze (+10 to +20) to add depth to the water without fake colours
- Recover shadows on cliff faces with the Shadows slider in Lightroom
- Add warmth to portraits (Temperature +200 to +400K) to counter cool water light
- Use masking to selectively sharpen the reef details without affecting the sky
- Export at sRGB for Instagram, AdobeRGB for print to preserve colour accuracy
Common Photography Mistakes Visitors Make
- Arriving at 10 AM or later, light is harsh, and the beach is filling up
- Shooting with auto white balance in bright sun results in inconsistent tones across a series
- Not bringing a lens cloth, sea spray gets on the glass constantly near the rocks
- Expecting the water to look like Instagram immediately, you still need good light and a polariser
- Forgetting to check the tide, low tide exposes rocky textures, great for foreground interest
- Using portrait mode for landscapes on smartphones, it introduces processing artefacts in complex backgrounds
What to Pack for a Crystal Bay Photography Day
- Polarising filter (circular), non-negotiable for water shots
- Neutral density filter (6-stop) for long exposures on rocks
- Waterproof dry bag for your camera when wading
- Microfibre lens cloth, you’ll use it every 15 minutes
- Lightweight tripod or travel tripod for sunrise/sunset
- Fully charged batteries, there’s no reliable power source on the beach
- 32GB+ memory cards in multiple small cards rather than one large one
Pack these photography essentials to capture Crystal Bay at its absolute best: read more in Crystal Bay Nusa Penida Guide: Before You Go, Read These Local Tips First.
Respecting Nature While Taking Photos
This is one of those things that needs to be said plainly: don’t stand on the coral to get a better angle. It kills the reef, literally, and Nusa Penida’s coral is already under significant pressure from tourist traffic. The marine ecosystem here is the reason the water looks the way it does. Protect it.
The temple at Crystal Bay (Pura Batu Melawang) is an active place of worship. Ask permission before photographing ceremonies, dress appropriately if visiting, and don’t use the temple purely as a photo backdrop without acknowledging what it actually is. Most locals are welcoming when photographers show basic respect.
Creating a Complete Crystal Bay Photo Story
A single hero shot is satisfying. But a complete photo story from Crystal Bay, arrival, the first view of the water, the reef from above, a portrait mid-afternoon, the sunset, a final candid, tells something richer and more useful to anyone who hasn’t been there.
Think in sequences. Wide establishing shots, then medium shots with context, then tight detail shots. The curve of a shell, the texture of the volcanic rock, the colour of a fishing boat. These details are what separate a travel photography portfolio from a standard tourist photo album.
Final Thoughts: Bringing Home More Than Pretty Pictures
Good crystal bay photography is less about technical perfection and more about being in the right place at the right time with enough knowledge not to waste it. Get there early. Know which rocks to sit on. Know what the water looks like at 6:30 AM versus 11 AM. These things matter more than which camera you’re carrying.
The place genuinely rewards the effort. Crystal Bay is one of those rare spots where even imperfect photos capture something real and beautiful, because the underlying subject is extraordinary. But the photographers who go home with truly memorable images are the ones who showed up prepared, and this guide is exactly that preparation.
Frequently Asked Questions
What is the best time of day for Crystal Bay photography?
Sunrise, between 5:30 and 7:00 AM, is the best time. The light is soft and golden, the beach is almost empty, and the water reflections are at their finest. Sunset also works well, though the beach is more crowded.
Do I need a drone permit to photograph Crystal Bay from the air?
For recreational drone use, registration is recommended but not always strictly enforced for casual visitors. For commercial photography, Indonesia’s DGCA requires registration. Always check the latest local regulations before flying, and be aware of wind conditions in the afternoon.
What camera settings should I use for bright beach photography at Crystal Bay?
Start with ISO 100, aperture f/8, and shutter speed around 1/250s for landscape shots. For motion-freezing waves, push the shutter to 1/1000s or faster. For long exposure silky water effects, use f/11–f/16, ISO 100, and a 1–2 second shutter with a neutral density filter.
Is Crystal Bay worth visiting just for photography?
Absolutely. Even if swimming and snorkelling aren’t your priority, Crystal Bay offers some of the most photogenic coastal scenery in the entire Bali region. The combination of turquoise water, volcanic cliffs, tropical greenery, and a traditional Balinese temple is genuinely rare.
Can I get good photos at Crystal Bay with just a smartphone?
Yes. Newer smartphones, particularly the iPhone 15 Pro and Samsung Galaxy S24 Ultra, handle bright beach conditions very well. Add a clip-on polarising filter (around $20–25 USD), shoot in RAW mode, and arrive early for soft light. The results can be excellent.
What makes Crystal Bay different from other Bali beaches for photography?
The visibility of the water is exceptional; you can see the reef structure from the surface with striking clarity. The temple on the headland adds a cultural dimension most beaches lack. And the relatively sheltered bay means calmer water and more reliable reflection opportunities than exposed coastal spots.